Probably my most requested blog post, finally put together for you! A grand list of my early ed activities must-have items. Nothing on this list to too special and majority of the items you will probably find around your house already! To see more tips on early childhood activities, visit this page here. This list is a good starting point if you want to be in a position to be able to just grab and go for activities. Nothing on this list is sponsored or endorsed, just a list from one Early Childhood Educator to another.
Paper/Sticker Supplies
Construction paper
Colored paper
Cardstock
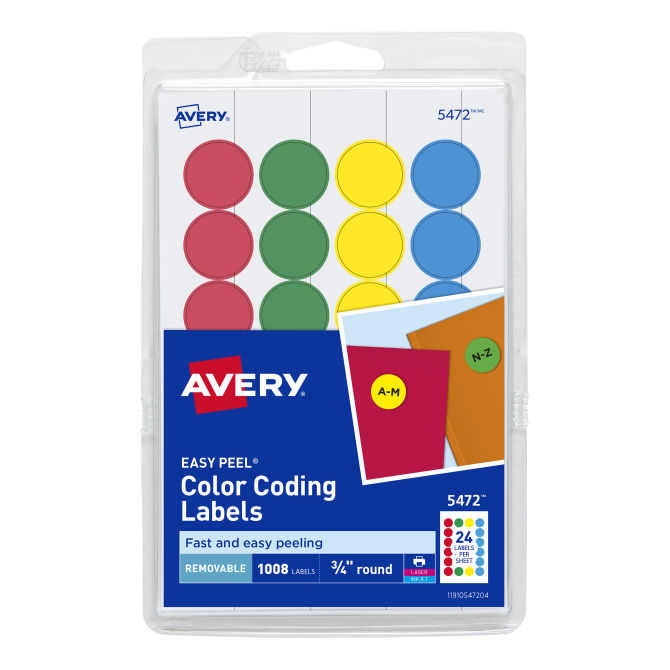
Dot stickers
Paint Supplies
Washable tempera paint
Washable watercolor paint
Rags for cleaning
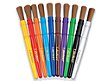
Paintbrushes- I like the chunkier, bigger kind. Not just the small ones that come with kid’s watercolor kits.
Office Supplies
Crayons
Markers
Permanent Markers- For you, not the kids!
Kid scissors
Pipe Cleaners
Glue
Glue sticks
Painters tape
Sticky notes
Sensory Bin Supplies
Large storage bin- roughly 28 qt
Small storage bin- roughly 6 qt
Sensory bin fillers: A lot of these are materials I have around my house or material I buy for a specific sensory bin I have in mind. I do not keep all of these materials on hand at all times.
Funnels
Small people or animals for pretend play
Bowls
Spoons
Ice cube trays
Muffin tin
Pompoms
Misc
Toothpicks
Popsicle Sticks
Food coloring
Dollar store or IKEA scrub brushes
Shoelaces
Colored beads
Squirt bottle
With this list of supplies that I have on hand, I can pull out an activity usually within a moments notice and only takes about a minute or two for me to set them up, I’m all about the easy, simple activities! If there is something specific I want to do with my kids I will make a trip to the store for those items.
Are there any other must-have items you keep on hand?
This winter has proven to be particularly hard for parents everywhere while we are trying to entertain our kids during these cold months without the aid of indoor playgrounds/ activities that we’ve had in the past. Being stuck inside all day can be so hard to get those gross motor skills working!
While I am a big supporter of outdoor play in the winter, there is still a need for good, safe, gross motor play in the home. Here are a few of the ideas that have kept us sane.
Indoor obstacle course: I just add painters tape X’s on the ground for my kids to jump on, our kitchen bench to crawl over or under. Utilize your stairs in the obstacle course if you can! Tape papers on the walls for them to high five, stools to jump off of, and more!
Grab some plastic cups: set up either like bowling bins OR in a pyramid and roll a ball at them. Watch the “crash!” and set them up again! Don’t worry about having to set it up over and over again, that’s a great job for your kiddos to get in on.
Practice some tumbling: Show them how to do somersaults, cartwheels, handstands, and more. There are videos on YouTube for kids to practice as well!
Dance party: Get up and moving with a dance party! Throw on your favorite music and get everyone moving.
Wastebasket Basketball: Crumple up some paper and shoot it into the garbage or recycling bin. You could also challenge them to search around for pieces of trash around the house to toss in. Cleaner house, fun activity, everyone wins!
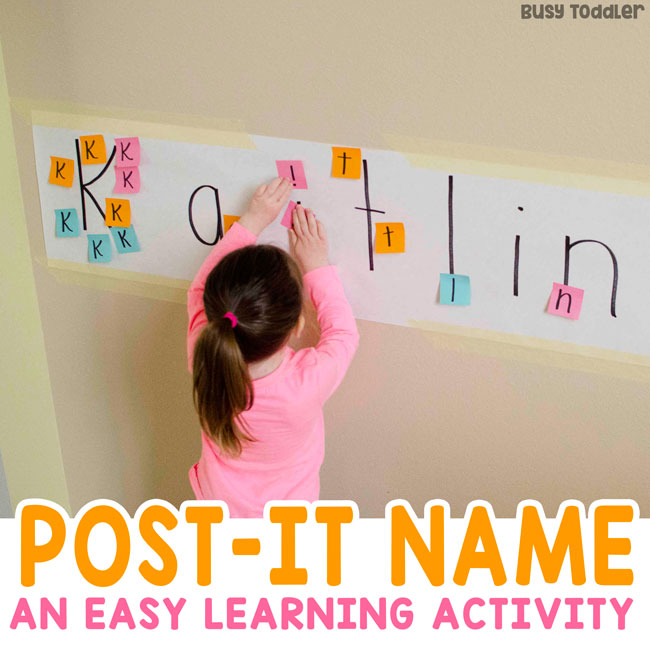
Sticky note find: this is one that is hard to describe without a picture, so I had to borrow this one from Busy Toddler’s website. Hide the sticky notes around the house and have them run around finding the sticky notes and running back to organize it where it goes! We’ve done this with colors, shapes, numbers, letters, or even just pictures!
Treasure Hunt: Grab a clipboard and a piece of paper and draw pictures of objects around the house for your littles to find. Once they find them, they can color it in, put a checkmark over it, or if accessible, have them take a camera or phone around taking pictures of their findings!
Paint in the bathtub: painting is typically a fine motor skill. But once it’s moved to the tub, it can become a gross motor skill! When the shower walls become your canvas, movement is inevitable, they’ll be using their arms to paint, not just their hands. Also the biggest bonus: easy cleanup! You can buy specifically bathtub paints, or I’ve found that regular washable paint does fairly well too. Use your best judgment.
Painters tape road: lay down some painter’s tape for “roads” throughout your home for your kiddos to drive cards on them. The biggest success with this is- make them go throughout your home. This is how you’ll get them moving! Keeping the tape in one congregated area of the playroom will keep the kids there too. Have the roads weave through the bedrooms and hallways, getting them to move their cars all over! You can extend this activity by setting up houses out of blocks and creating a whole city throughout the entire house!
If you’re here you need some direction on how to start up sensory bins and other activities for the early childhood age! So before we begin, I want to share with you a whole page I’ve put together of multiple blog posts that can direct you and answer questions that you may have. Check it out here!
Adding in hands-on activities for your early childhood learners can be overwhelming at first, but don’t stress! I am here to help. What qualifies me? I was in the exact same position as you a few years ago. I had the desire to be the #teachermom that pulls out fun, educational activities for my kids, and even followed plenty of people on social media giving me all of the ideas for activities. BUT it seemed absolutely overwhelming to do so. Eventually, I got the hang of it, and now I am in a place where I can walk you through it! Here’s what I did.
I invested in materials. Typically, these materials are fairly inexpensive and you’ll probably find a lot of them around your home (rice, cooking utensils, paper, markers). But I found the most success when all of the materials were there and ready for me to pull out. I spent around $75 at Amazon, Walmart, and The Dollar Store combined. This is also partially because I didn’t want to share my kitchen materials with my kid’s activities, so I spent a good chunk on new spoons, cups, muffin tins, etc. Having all of the materials together and organized helped tremendously to help me feel like I could be a part of this crafty early childhood educator bandwagon of hands-on activities!
I lined out the purpose of these activities. Yes, I want my child to have these experiences and learning opportunities. But was I setting up activities for me to sit down and work with my kids one-on-one? Did I need the activities out to keep them entertained while I worked on something else? Yes to all of the above. However, it would take time to achieve the latter.
I decided to use the sensory bins and activities for one-on-one time and connection with my kids at first, and then eventually use them as something for them to do while I made dinner or worked. I wouldn’t be setting myself up for success by expecting my kids to play independently and keeping expectations of the activities.
I found the right social media accounts to follow. There are parents and educators out there that have done all of the dirty work for us! You don’t have to carefully create a new activity each time you feel your child needs entertainment or has a skill they need to practice. Others have already done it, and they are on social media! My favorites: Busy Toddler and Days with Gray.
These two stand out to me because they don’t post extravagant activities. It takes minimal set up time, simple materials, and are doable for any parent or educator to put together! Watch out for those social media accounts that are posting above and beyond activities that will make you feel inadequate to carry them out!
I made a schedule. This was a temporary thing that I didn’t have to do for long, but helped initially. It made it predictable for all of us and gave me a visual of what I could expect. I decided activities in the morning would be 1:1 and done with new activities that needed a lot of supervision. Afternoon activities, while I was cooking dinner, would be independent activities that I knew I could trust my kids alone with. It looked like this:
Week one: Activities in the morning after breakfast, before nap.
Monday: bubble foam Tuesday: rice scoop and transfer Wednesday: water painting on construction paper Thursday: Color mixing pour station Friday: contact paper art
Week two: morning activities for together time, afternoon activities for independent play
Monday morning: moon sand Tuesday afternoon: water painting on construction paper Wednesday morning: color mixing pour station Thursday afternoon: contact paper art Friday morning: dot sticker line-up/ color match
Week three: Start trying two activities a day!
Monday morning: moon sand Monday afternoon: sticky note shape match Tuesday morning: rice bin scoop and transfer Wednesday afternoon: water sensory bin Thursday morning: play dough Friday afternoon: dot sticker activity
This isn’t exactly but gives you an idea. Mornings were for working together and learning together. Afternoons were for independent play with materials I could trust my kids with. This schedule didn’t last forever, only about 3-4 weeks. But once I was in the rhythm and knew what to expect more, I didn’t need the schedule as much and slowly tapered off. Eventually pulling out activities became intuitive and I could tell when we needed one, what type it needed to be, and so forth.
Do what you feel comfortable with. Are you not into playdough or paint? THAT IS OKAY! You can still have success. Just because a teacher or mom on Instagram shows how “easy” and “doable” it is to let children play with slime doesn’t mean you have to do it too.
My first activities with my daughter were water sensory bins (because all it takes to clean up when it spills is a towel.) and “painting” with water on construction paper. Again, because cleaning up water is mounds easier than cleaning up rice.
Eventually, all of our water play led to me being more comfortable with dried corn in a sensory bin. Then rice. Then, I let my daughter paint… It was absolutely nerve-wracking, but guess what I learned? The paint can be cleaned up. I can clean it up, and my daughter can learn how to clean when she helps! “Everything can and will be cleaned up.” Now, years later, we paint at least once a week, and I can comfortably leave my 3.5-year-old alone at our kitchen table to play with play-dough. Rome wasn’t built in a day, friends.
Set you and your kids up for success. This is something that deserves a whole blog post, but I’m going to sum it up in two paragraphs for you. When setting up activities, think ahead. Are you working with paint? Keep a wet rag close by for messes. Maybe today is rice sensory bin day? Don’t put the bin near the fridge, because when it inevitably spills, it will roll under there and you won’t ever want to set up a rice sensory bin again. Also, set your kids up for success. No child was born knowing how to play properly in dried rice and corn, they need boundaries and rules! Keep it simple, but keep them there.
Don’t add too much rice, don’t give them access to too much paint, or too much water, etc. Use big blankets or dollar store table cloths and shower curtains to protect your floors. And know your exit plan. What will clean up look like? What will your child help with, and what will you take on? Read my whole list of sensory bin tips here.
I know, I know. This post can be just as overwhelming, if not more so than you were before. But take it in baby steps! Figure it out as you go! Your child isn’t looking for the perfectly curated bin with exactly the lessons and skills they need for their current age and stage.
Your child is looking for an opportunity to play. To spend time with you. To just be a kid. These finite details aren’t here to scare you away or add more to your plate, it’s just a reference guide for when you need help.
So let’s break it down to basics.
How do you start a rice sensory bin? Open a bag of rice. Pour contents into a large bin or bowl. Add in a cup and spoon. Sit on the floor with your child and enjoy.
It really is that simple. So, go play! Go have fun! And go let those kids explore!
It was 4 pm and the TV in our basement was blaring. Almost in a daze as I made dinner, I tried to calculate how many hours of screen time my daughter had for that day.
“The entire movie of Frozen, plus four episodes of Mickey Mouse Club House. Or was it five episodes? Maybe this was episode six for the day…?” Regardless, I don’t know if the TV had ever actually been shut off, and for that, I was ashamed. I always thought I would be better at regulating screen time with my kids, but right then, I needed to make dinner, and keeping the TV on was the only way it was going to happen.
Now repeat this same situation for a week. Something needed to change, and soon.
I threw around the idea of TV time tokens with chores and such, but it felt like so much work that I wouldn’t actually follow through with it, and to get my husband on board seemed impossible. Simply saying “one episode and one movie a day” as we had in the past didn’t feel like it would work either, because here we were at this point, needing a new solution.
One day, I finally found our core problem. Who was addicted to the constant noise of the television? It wasn’t my daughter, even though she was the one watching it. It finally clicked in my brain that it was me who was addicted to screen time, not her. I was the one not wanting to take time to manage it and tell her no. It was easier for me to just tell her yes to Mickey Mouse and not deal with the fight of saying no, or the boredom that would follow if I didn’t allow it. She kept asking for shows because I kept letting her watch them. I needed to change.
Again, more and more brainstorming on the best way to manage the screens in our household ran through my mind before I found a solution. It needed to be easy and convenient because if it was too much work for myself, I knew I would cave.
It was about another week later when the solution hit me.
Let her manage her TV time by herself. Bam. It was that easy. With the proper settings in place, why couldn’t she? Why did I need one more thing to worry about as a mom?
Here’s what I did. (Please keep in mind, none of this is sponsored, it’s just what I chose to do/use).
We have an Amazon smart TV, which comes with a kid’s FreeTime app. On this app, I am able to set which TV apps my daughter has access to and how much screentime she is allowed. We gave her access to Disney+, PBS, and Netflix kids account. Considering that we were at 5+ hours of TV time a day, we set the time limit for 3 hours a day to see where that would get us.
Then came the time to teach her how to use the TV on her own. I spent time showing her the power button and how to use the navigation to move around to which app she wanted. I taught her how to specifically get into the FreeTime app and then navigate from there. And I explained how she only had so much time to watch her shows. Once the time was up, that’s all she had for the day, and would have to find something else to do.
One week of this in place and we never even hit the 3-hour time limit. I moved it down to 2 hours and occasionally she would hit her time limit. If she ever did, she would be sad for a minute, turn off the TV, and then find another way to occupy her time. We are now at a 1-hour 25-minute time limit for a day and it seems to be just the right amount of screentime for us.
In a matter of weeks, we went from 5+ hours of my daughter in front of the TV, to 1 hour, 25 minutes. If that. And the biggest contributing factor was that it wasn’t me micromanaging it, it was me placing the responsibility of the TV in her hands, with a little help to stay in the correct apps and managing the time.
Here are a few reasons why I think it worked so well.
Just knowing there was a time limit helped all of us remember not to just turn it on anytime we wanted. Everyone was more mindful about when to use the TV. Especially myself, when I knew that the TV running while I made dinner was my biggest saving grace, I needed to use it as a tool at this time, so I didn’t want her time limit running out before 5 pm.
We were lucky enough to have the ability to use the Amazon FreeTime app, which came with all of the settings we needed. Once she was in the app, she couldn’t get out without the parent password.
We didn’t use her time limit on family movie nights. If it was a movie we turned on for all of us to enjoy together, that time was on us.
The fact that we trusted our daughter with the TV remote and gave her the responsibility of regulating it for herself made all the difference to her. She hesitated to complain about her screentime coming to an end because she was grateful we let her run the TV herself.
We also set time limits that she could not watch shows before 8 am or after 8 pm.
At one point she figured out she could watch TV longer if she didn’t get into the FreeTime app. After a firm talk with her about why that wasn’t okay and that she needed to only use the FreeTime app, we haven’t had any problems since.
We’ve been using this method for over two months now and it still seems to be working great. My favorite part is that once screentime is over, she silently resigns the remote to its designated spot on the shelf and quickly finds her way to the toy shelf to find a new way to occupy her time. There’s no screaming, no fighting, no trouble!
She has less TV time, I am not constantly trying to keep track of how long the screens are on or changing from show to show for her all day. The TV remote is in her hands, it’s her responsibility, and we all win!
Just another great example of self-reg and why teaching children how to be independent can be helpful to everyone involved.
Strong-willed children. Independent children. You know them, raise them, teach them, and love them. But man, it can be so hard. So hard. I know this because I have a strong-willed child myself. I’ve been brainstorming my favorite tried and true ways to help foster this independence in children, whether they are the strong-willed type or not. It will mostly be in a bullet point list so that this doesn’t turn into a lengthy post.
Don’t be a helicopter mom.
Read more about my experience being a helicopter mom with both of my kids.
Give kid access where possible. Can you imagine living in a house where everything is out of reach and inaccessible? Because that’s how your kids can feel. It is freeing for them to have everyday things on their level to have access to.
Access to their dishes
Access to electronics, with boundaries.
Helping make meals and snacks
Access to snacks/ food- again with boundaries.
Books and toys at their level.
Think “what can I not do”
Can your child wipe down their high chair after a meal?
Sweep the floor with a dustpan and small brush?
Put items away?
Tip: Give them specific tasks, not big tasks.
Example: “Can you put this pair of shoes in your closet?” instead of “Please clean up the front room.” Younger kids can get so overwhelmed by these bigger tasks! Break them down. It takes a lot more conversation and working with them, but doing this can eventually lead to, “Can you please clean up the front room?”
Basic daily tasks they can do by themselves.
Getting dressed (clothes at their level)
Brushing teeth
Using the bathroom
Opening snacks and drinks
Preparing meals
Getting buckled in the car (with supervision)
Helping grab items off the shelves in grocery stores.
Opening doors for self and others.
Remember that struggles are okay. It’s okay if your child doesn’t get it right the first time or becomes frustrated when they can’t do a task. In the words of Daniel Tiger, “Keep trying, you’ll get better!” Always keep in mind that they are only (this many) years old. For example, when my daughter can’t get her shoes on by herself, I remind myself, “It’s okay, she’s only 3 years old.” to keep it in perspective that I shouldn’t be expecting her to act older than she is.
Remember that messes are okay. Learning and growing are messy and hard! Everything can and will be cleaned up. And I firmly believe that kids learn the responsibility of being clean when they are given the chance to get messy and clean up. It’s important that they are expected to clean up too! Even if it’s just a small portion of the mess.
Remember that getting hurt is okay if it’s not serious. A short tumble off the bottom step of a ladder, a little slip in the grass, and other small ways kids get hurt are how they learn to move their bodies without getting hurt someday.
Remember that you are the parent/ teacher and you have the right to any boundaries you want to set. Constantly be evaluating your boundaries to see if you need to give more or less freedom. Do what is comfortable for you!
Ex: It’s okay for you to have this cupboard of dishes. But it’s not okay for you to pull out all of these dishes and spread them all over the kitchen.
Ex: It’s okay for you to play on your tablet or watch TV, but I will set a timer for one hour and that’s all the screen time you can get for the day.
Ex: It’s okay for you to play in the backyard by yourself, but I will close the gates so it is locked in and leave the window open so I can hear you if you need me.
Ex: You can buckle yourself into the car by yourself, but I will check it when you’re done to make sure you are safe.
Ex: You can ride your bike on the sidewalk by yourself, but you cannot go past that tree down the road, it is too far.
The power of choice is your BEST FRIEND when it comes to an independent-minded child. You choose what they can have, but the ultimate choice is in their hands.
Ex: Do you want a PB&J for lunch or a ham sandwich?
Ex: Do you want to go down the slide first, or swing first?
Ex: You can wear a yellow shirt or a green shirt today, which shirt do you want?
Ex: We need to go to Walmart and Costco today, which one should we go to first?
Ex: Do you want to walk to the car, or do you want me to carry you?
“Go for good enough” – How your child performs doesn’t have to be perfect. It just has to be good enough.
Conversations/ questions to have with your strong-willed child about to attempt something or just have attempted something. These conversations can lead to good, independent decision making.
“Why do you think that happened?”
“Show me how you like to do it!”
“What would happen if you did it this way?”
“What are all of our options?”
What else would you add to this list? Bookmark it to save for later! This much information can be overwhelming to remember all at once, so keep this post tucked away and pull it out when you find yourself frustrated with your strong-willed child.
Hi friends! A lot of my posts lately have been focused on early childhood and how we can foster this education as parents and teachers. It’s been my focus simply because it’s my daily life right now. I spend the majority of my day fostering the learning of a one-year-old and a three-year-old, so naturally, it’s where my thoughts have been centered.
Because I have been throwing this content at you so much, I felt like it needed a place where it’s all corralled for you for easier searching. Lo and behold! My early childhood page!
Featured on the page are sensory bin lists, tips, and recipes. Some thoughts on raising independent kids. Really great articles on PLAY. And bonus material on emotions in kids and using Myers- Briggs and Enneagram to understand your child better.
This list and page will be ever growing as I continue to create new content in this scope of ideas, so check back later for more articles. You can find this new page on our top banner under “blog”.
Did you catch my post a few weeks ago on how to find success with dyed rice sensory bins? This post will give you tips on rice sensory bins, as well as our favorite tools for rice play. Today, I wanted to share how to make the dyed rice! Here’s my tried and true recipe plus some tips! This rice is taste-safe but does not mean it should be eaten by the handful.
Materials:
1 cup dry rice 1 tablespoon vinegar Lots of food coloring! Liquid or Gel Sandwich bags Sheet pan Wax paper/ parchment paper/ tin foil (optional but nice to have)
Instructions:
Place the rice and vinegar in a plastic sandwich bag. Squirt in lots of food coloring. The more food coloring, the deeper and better the color will turn out.
Sandwich bag with rice, vinegar, and food coloring
Shake the bag until the coloring is evenly spread through the rice!
Spread the rice on a sheet pan to dry. I like to cover my pan with parchment paper (or something similar) to keep the pan cleaner. If this isn’t possible, it’s fine to place the rice directly on the pan. In my experience, it has always washed off with a little soap and water
Dump the rice on a sheet pan
Spread it thin. This is one cup of rice on one half of a standard size cookie sheet.
*The thinner you spread the rice, the faster it will dry.
*For an even faster dry time, put in the oven on the lowest setting. If it’s a sunny day, place outside to dry.
After about 30 minutes, you will have to break up chunks of rice that stick together.
The rice is dry once you can run your fingers through it and it doesn’t leave a residue of color on your fingers.
Other Tips:
Use the 1:1 ratio for rice and vinegar. You can do 2 cups of rice, 2 Tbs vinegar, and so on…
The sandwich bag is a great way for kids to get involved in making the rice, they do great at mixing up the color into the rice!
HOWEVER, we’ve had our fair share of little fingers puncture the ziplock bag, sending rice everywhere and food coloring places you don’t want. Teach your kids to mix the bag with flat hands and rub, like this!
If you’re looking to use less plastic, a glass bowl and spoon work great to mix as well. Make sure to rinse and dry the bowl and spoon before starting another color so you don’t mix colors.
Store in a gallon Ziploc bag or tupperware container.
The rice smells strongly of vinegar for a time. Leave the baggie or container open all day or through the night to get rid of the smell before sealing and storing. Once the vinegar smell goes away, I have never found the strong smell to come back.
The rice can last for years and years stored in an airtight container!