Probably my most requested blog post, finally put together for you! A grand list of my early ed activities must-have items. Nothing on this list to too special and majority of the items you will probably find around your house already! To see more tips on early childhood activities, visit this page here. This list is a good starting point if you want to be in a position to be able to just grab and go for activities. Nothing on this list is sponsored or endorsed, just a list from one Early Childhood Educator to another.
Paper/Sticker Supplies
Construction paper
Colored paper
Cardstock
Dot stickers
Paint Supplies
Washable tempera paint
Washable watercolor paint
Rags for cleaning
Paintbrushes- I like the chunkier, bigger kind. Not just the small ones that come with kid’s watercolor kits.
Office Supplies
Crayons
Markers
Permanent Markers- For you, not the kids!
Kid scissors
Pipe Cleaners
Glue
Glue sticks
Painters tape
Sticky notes
Sensory Bin Supplies
Large storage bin- roughly 28 qt
Small storage bin- roughly 6 qt
Sensory bin fillers: A lot of these are materials I have around my house or material I buy for a specific sensory bin I have in mind. I do not keep all of these materials on hand at all times.
Funnels
Small people or animals for pretend play
Bowls
Spoons
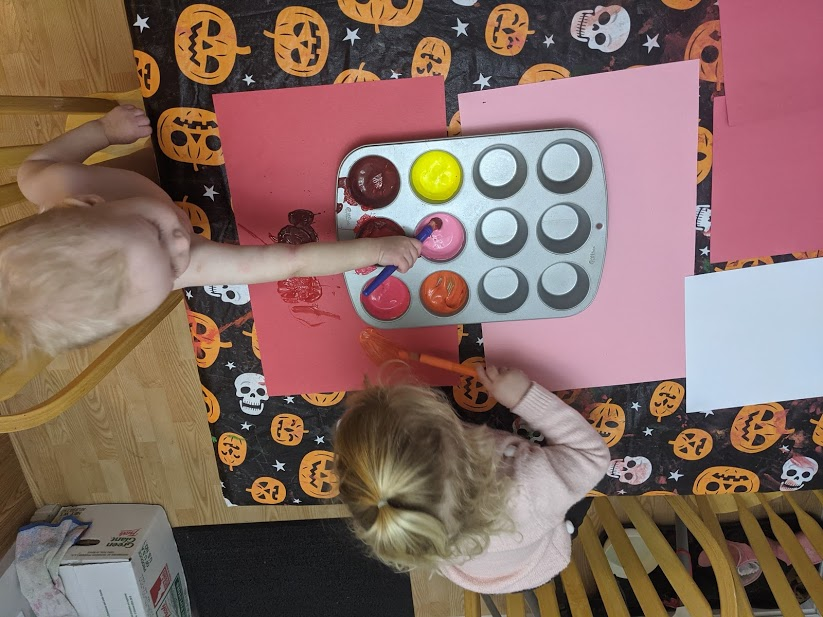
Ice cube trays
Muffin tin
Pompoms
Misc
Toothpicks
Popsicle Sticks
Food coloring
Dollar store or IKEA scrub brushes
Shoelaces
Colored beads
Squirt bottle
With this list of supplies that I have on hand, I can pull out an activity usually within a moments notice and only takes about a minute or two for me to set them up, I’m all about the easy, simple activities! If there is something specific I want to do with my kids I will make a trip to the store for those items.
Are there any other must-have items you keep on hand?
Kids are messy. And that can be incredibly stressful.
Messes mean things are out of control and someone has to clean it up (and it’s probably going to be YOU.)
Messy activities can be unpredictable and scary.
But there’s a method to the madness when kids are building endless forts, dumping out all of the legos, and spreading paint in every corner.
If you look past the mess, that’s where the learning lies.
Take a second to look at the blocks scattered to every corner to notice the tiny houses built high, and the toy cars driving between them. Realize that this means they are practicing and learning about their own sense of community, using their fine motor skills AND gross motor skills as they move blocks and cars while also crawling around from home to home.
When the paint is dripping from the paper take a second to remember that your child just learned important spatial awareness skills, got in some practice holding a paintbrush (which can later translate into holding a pencil), took in information on colors and the reaction they’ll get when colors are mixed, and more.
In all of the messy play, there is learning buried deep under it, essential learning they will need for the rest of their life.
Sometimes the learning includes boundaries, such as keeping the blocks in a certain room and not throwing them. Sometimes the learning means how to be responsible with the paint and not get it all over the walls and doors. Read more about setting up kids for success here.
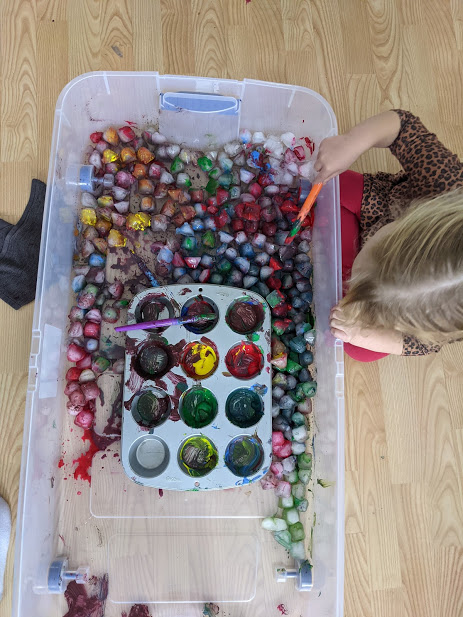
And part of messy play is the aspect of learning to be clean. Kids cannot learn the responsibility of being clean until they are given the chance to be messy. Kids are smart! When you have an ice bin full of paints and paintbrushes and the activity comes to a close, they are going to learn that the paint tray needs to be put in the sink and rinsed out. That their paintbrushes need to be washed, and the ice needs to be properly disposed of, with the bin wiped clean, before any more play can happen.
If clean up also includes changing their clothes because they got them wet or covered in paint, that adds time. If they also need to wipe up the floor because they spilled so much, that adds time.
They want to be able to go from painting an ice bin to playing on the slide as fast as possible, to they will learn how to be responsible playing with messy activities. And they will learn how to clean up and handle a mess when it inevitably happens. It takes time and practice, but it comes eventually.
You’ll see this translate to real-life applicable skills when your child spills their water and instinctively grabs a rag to clean up the mess, without you asking! Because they know what it means to clean up after themselves, and they learned how they learn best- through play!
Did you catch how many times I mentioned the words “mess” and “learn” in this article? About the same amount of times! Because those two go hand in hand! Let the kids be messy, they are learning.
I’ve written a few blog posts giving tips and advice and often say “set your kids up for success.” I give a quick little excerpt of what that means, but I really want to dive deep into this topic and define what it means to set your kids up for success.
In a parent or teacher role, we set expectations for our kids.
“Ask before using the restroom.”
“Keep the paint on the paper and reasonably clean.”
“Do well this spelling test.”
We can give our kids these expectations, but it’s a two-part system: We have to set them up for success to carry out these expectations before we can expect them.
What does that look like? If we expect them to ask before using the restroom, we must make ourselves approachable and give them the resources needed to ask to go. Such as a hand signal or allowing them to raise their hands.
If we want them to do well on a spelling test, we have the responsibility as the adult to provide them with the spelling words to practice before they head into the test. We don’t give them a spelling test of worlds they’ve never seen and expect them to do well! It’s unfair.
If we expect them to keep the paint clean during their craft time, we have to be responsible for giving them the proper space, table covers, and rags to clean up any accidents.
If we are going to expect things from them, we need to set them up for success before we can realistically keep these expectations. So during activities when I say, “set your kids up for success with a rice bin” I mean, lay down that blanket so the rice doesn’t go rolling under the fridge. We want them to keep the rice in the bin, but we all know that won’t 100% happen. When they are playing with oobleck or slime, set a wet rag next to them to wash dirty hands so they don’t track the material all over the house when they become overwhelmed with the mess. They won’t be able to navigate the road without giving them the map first.
When a spelling test is coming up, handing out the spelling words before the test is the minimum. Practicing the words is the next step. Giving them ideas on how they can practice at home is great too!
What does this accomplish for us by taking the extra time and effort to do these things for them? Less frustration for us! Less time spent
It is so important for us to set our kids up for success! Give them the means to accomplish what they need in order to find success. Don’t get me wrong, I’m all for letting our kids struggle a little to learn, but we still have a job as the adult to set them up with the tools they need. If you want to read more on that, check out my post on lighthouse parenting.
What other things do you do to set your kids up for success?
This winter has proven to be particularly hard for parents everywhere while we are trying to entertain our kids during these cold months without the aid of indoor playgrounds/ activities that we’ve had in the past. Being stuck inside all day can be so hard to get those gross motor skills working!
While I am a big supporter of outdoor play in the winter, there is still a need for good, safe, gross motor play in the home. Here are a few of the ideas that have kept us sane.
Indoor obstacle course: I just add painters tape X’s on the ground for my kids to jump on, our kitchen bench to crawl over or under. Utilize your stairs in the obstacle course if you can! Tape papers on the walls for them to high five, stools to jump off of, and more!
Grab some plastic cups: set up either like bowling bins OR in a pyramid and roll a ball at them. Watch the “crash!” and set them up again! Don’t worry about having to set it up over and over again, that’s a great job for your kiddos to get in on.
Practice some tumbling: Show them how to do somersaults, cartwheels, handstands, and more. There are videos on YouTube for kids to practice as well!
Dance party: Get up and moving with a dance party! Throw on your favorite music and get everyone moving.
Wastebasket Basketball: Crumple up some paper and shoot it into the garbage or recycling bin. You could also challenge them to search around for pieces of trash around the house to toss in. Cleaner house, fun activity, everyone wins!
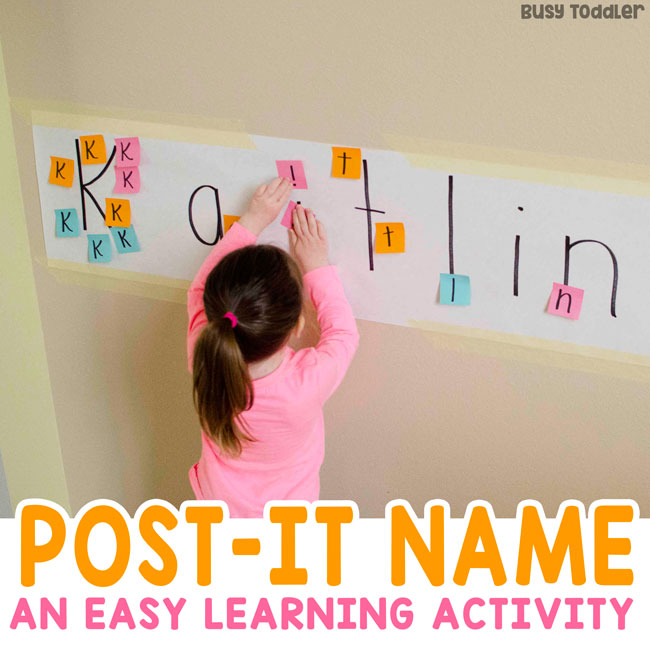
Sticky note find: this is one that is hard to describe without a picture, so I had to borrow this one from Busy Toddler’s website. Hide the sticky notes around the house and have them run around finding the sticky notes and running back to organize it where it goes! We’ve done this with colors, shapes, numbers, letters, or even just pictures!
Treasure Hunt: Grab a clipboard and a piece of paper and draw pictures of objects around the house for your littles to find. Once they find them, they can color it in, put a checkmark over it, or if accessible, have them take a camera or phone around taking pictures of their findings!
Paint in the bathtub: painting is typically a fine motor skill. But once it’s moved to the tub, it can become a gross motor skill! When the shower walls become your canvas, movement is inevitable, they’ll be using their arms to paint, not just their hands. Also the biggest bonus: easy cleanup! You can buy specifically bathtub paints, or I’ve found that regular washable paint does fairly well too. Use your best judgment.
Painters tape road: lay down some painter’s tape for “roads” throughout your home for your kiddos to drive cards on them. The biggest success with this is- make them go throughout your home. This is how you’ll get them moving! Keeping the tape in one congregated area of the playroom will keep the kids there too. Have the roads weave through the bedrooms and hallways, getting them to move their cars all over! You can extend this activity by setting up houses out of blocks and creating a whole city throughout the entire house!
I’ve had a lot of conversations with friends lately about their preschool-aged kids and how the majority of preschool teachers are very focused on learning letters. They assign homework or make comments like, “Maybe work with your student on their letters at home, he seems to not be picking them up as fast as other kids.”
WHY.
Why are we so focused on kids learning letters and reading so early? Why are we adding to the stress and pressure moms feel? Why do we feel like walking away from preschool with every single letter memorized is our end goal here?
Let’s talk about other skills kids learn and walk away with from preschool that is even more important than letters and numbers.
Social skills- working with other children in play and at learning stations.
Language skills- walking away from school talking better and easier to understand.
Coping skills- how to handle emotions when mom and dad leave or someone takes a toy they wanted.
Responsibility with sensory bins, play dough, paint, toys, and other items.
Fine motor development- working through fine motor activities such as stickers or fingerpaint so later in life, they can do things like…. Hold a pencil.
Gross motor development- jumping and skipping and throwing.
Gaining a love and appreciation for literature.
Spatial awareness.
How to open snacks independently.
How to prepare food.
How to advocate for themselves.
How to communicate needs and wants.
Empathy and sympathy.
There is a list of OVER TEN things that preschool-age students walk away with that are essential to the future of their education, yet we are still focusing on learning letters and numbers. Yes, learning letters and numbers are important and we should focus on them as well! But it shouldn’t be our only spotlight. Play is a child’s work, it’s how they learn and grow. If we are giving them adequate time to play and interact with peers and adults, that’s what they need more than anything.
Please stop adding to the stress of parents and students by shoving numbers and letters down their throats! Please celebrate all of the accomplishments your child is achieving during preschool!
If you’re here you need some direction on how to start up sensory bins and other activities for the early childhood age! So before we begin, I want to share with you a whole page I’ve put together of multiple blog posts that can direct you and answer questions that you may have. Check it out here!
Adding in hands-on activities for your early childhood learners can be overwhelming at first, but don’t stress! I am here to help. What qualifies me? I was in the exact same position as you a few years ago. I had the desire to be the #teachermom that pulls out fun, educational activities for my kids, and even followed plenty of people on social media giving me all of the ideas for activities. BUT it seemed absolutely overwhelming to do so. Eventually, I got the hang of it, and now I am in a place where I can walk you through it! Here’s what I did.
I invested in materials. Typically, these materials are fairly inexpensive and you’ll probably find a lot of them around your home (rice, cooking utensils, paper, markers). But I found the most success when all of the materials were there and ready for me to pull out. I spent around $75 at Amazon, Walmart, and The Dollar Store combined. This is also partially because I didn’t want to share my kitchen materials with my kid’s activities, so I spent a good chunk on new spoons, cups, muffin tins, etc. Having all of the materials together and organized helped tremendously to help me feel like I could be a part of this crafty early childhood educator bandwagon of hands-on activities!
I lined out the purpose of these activities. Yes, I want my child to have these experiences and learning opportunities. But was I setting up activities for me to sit down and work with my kids one-on-one? Did I need the activities out to keep them entertained while I worked on something else? Yes to all of the above. However, it would take time to achieve the latter.
I decided to use the sensory bins and activities for one-on-one time and connection with my kids at first, and then eventually use them as something for them to do while I made dinner or worked. I wouldn’t be setting myself up for success by expecting my kids to play independently and keeping expectations of the activities.
I found the right social media accounts to follow. There are parents and educators out there that have done all of the dirty work for us! You don’t have to carefully create a new activity each time you feel your child needs entertainment or has a skill they need to practice. Others have already done it, and they are on social media! My favorites: Busy Toddler and Days with Gray.
These two stand out to me because they don’t post extravagant activities. It takes minimal set up time, simple materials, and are doable for any parent or educator to put together! Watch out for those social media accounts that are posting above and beyond activities that will make you feel inadequate to carry them out!
I made a schedule. This was a temporary thing that I didn’t have to do for long, but helped initially. It made it predictable for all of us and gave me a visual of what I could expect. I decided activities in the morning would be 1:1 and done with new activities that needed a lot of supervision. Afternoon activities, while I was cooking dinner, would be independent activities that I knew I could trust my kids alone with. It looked like this:
Week one: Activities in the morning after breakfast, before nap.
Monday: bubble foam Tuesday: rice scoop and transfer Wednesday: water painting on construction paper Thursday: Color mixing pour station Friday: contact paper art
Week two: morning activities for together time, afternoon activities for independent play
Monday morning: moon sand Tuesday afternoon: water painting on construction paper Wednesday morning: color mixing pour station Thursday afternoon: contact paper art Friday morning: dot sticker line-up/ color match
Week three: Start trying two activities a day!
Monday morning: moon sand Monday afternoon: sticky note shape match Tuesday morning: rice bin scoop and transfer Wednesday afternoon: water sensory bin Thursday morning: play dough Friday afternoon: dot sticker activity
This isn’t exactly but gives you an idea. Mornings were for working together and learning together. Afternoons were for independent play with materials I could trust my kids with. This schedule didn’t last forever, only about 3-4 weeks. But once I was in the rhythm and knew what to expect more, I didn’t need the schedule as much and slowly tapered off. Eventually pulling out activities became intuitive and I could tell when we needed one, what type it needed to be, and so forth.
Do what you feel comfortable with. Are you not into playdough or paint? THAT IS OKAY! You can still have success. Just because a teacher or mom on Instagram shows how “easy” and “doable” it is to let children play with slime doesn’t mean you have to do it too.
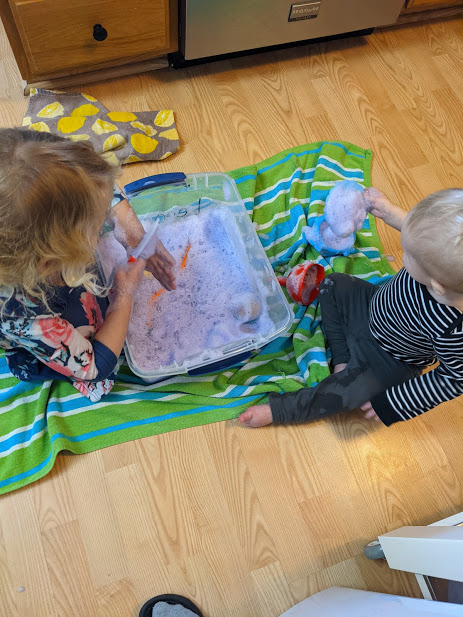
My first activities with my daughter were water sensory bins (because all it takes to clean up when it spills is a towel.) and “painting” with water on construction paper. Again, because cleaning up water is mounds easier than cleaning up rice.
Eventually, all of our water play led to me being more comfortable with dried corn in a sensory bin. Then rice. Then, I let my daughter paint… It was absolutely nerve-wracking, but guess what I learned? The paint can be cleaned up. I can clean it up, and my daughter can learn how to clean when she helps! “Everything can and will be cleaned up.” Now, years later, we paint at least once a week, and I can comfortably leave my 3.5-year-old alone at our kitchen table to play with play-dough. Rome wasn’t built in a day, friends.
Set you and your kids up for success. This is something that deserves a whole blog post, but I’m going to sum it up in two paragraphs for you. When setting up activities, think ahead. Are you working with paint? Keep a wet rag close by for messes. Maybe today is rice sensory bin day? Don’t put the bin near the fridge, because when it inevitably spills, it will roll under there and you won’t ever want to set up a rice sensory bin again. Also, set your kids up for success. No child was born knowing how to play properly in dried rice and corn, they need boundaries and rules! Keep it simple, but keep them there.
Don’t add too much rice, don’t give them access to too much paint, or too much water, etc. Use big blankets or dollar store table cloths and shower curtains to protect your floors. And know your exit plan. What will clean up look like? What will your child help with, and what will you take on? Read my whole list of sensory bin tips here.
I know, I know. This post can be just as overwhelming, if not more so than you were before. But take it in baby steps! Figure it out as you go! Your child isn’t looking for the perfectly curated bin with exactly the lessons and skills they need for their current age and stage.
Your child is looking for an opportunity to play. To spend time with you. To just be a kid. These finite details aren’t here to scare you away or add more to your plate, it’s just a reference guide for when you need help.
So let’s break it down to basics.
How do you start a rice sensory bin? Open a bag of rice. Pour contents into a large bin or bowl. Add in a cup and spoon. Sit on the floor with your child and enjoy.
It really is that simple. So, go play! Go have fun! And go let those kids explore!
But I can’t give you these blog posts about how much you shouldn’t be a helicopter parent without giving you an alternative. In fact, I needed an alternative way to parent myself! This is when my research led me to lighthouse parenting.
The whole concept of lighthouse parenting is that of a lighthouse- constant and always there. Keeping watch and being aware of your surroundings, but also respect the fact that kids can stumble and fall and learn lessons on their own.
“I like to think of myself as a lighthouse parent, you know reliably there, totally trustworthy, making sure he doesn’t crash against the rocks, but committed to letting him learn to ride the waves,” – Ginsburg
The whole idea of lighthouse parenting is that is it adaptable as your child grows and develops, your parenting grows and develops as well into what they need at that moment.
So for our children, our students, our future: Be a lighthouse parent. Let kids explore, let them learn and grow, but find a balance with keeping them safe.